System Options Menu
81 Arming Options
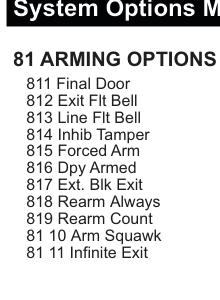
Menu tree showing 81 ARMING OPTIONS with sub-items: 811 Final Door, 812 Exit Flt Bell, 813 Line Flt Bell, 814 Inhib Tamper, 815 Forced Arm, 816 Dpy Armed, 817 Ext. Blk Exit, 818 Rearm Always, 819 Rearm Count, 81 10 Arm Squawk, 81 11 Infinite Exit.
Used to select options for arming the panel.
| # | Option | Description |
|---|---|---|
| 811 | Final Door | When selected will terminate the exit buzzer 6 seconds after all exit routes and access routes have closed. |
| 812 | Exit Flt Bell | When enabled will trip the internal bell output in the event of an exit fault e.g. if an E/E zone is still open at the end of exit time. |
| 813 | Line Flt Bell | When enabled will trip the strobe, internal & external bell outputs in the event of a line fault (when the system is Armed). |
| 814 | Inhib Tamper | When enabled allows the user to inhibit tampers. |
| 815 | Forced Arm | When enabled, allows the user to inhibit all open inputs using ** and all open tampers (if Inhib Tamper is enabled) using ##. |
| 816 | Dpy Armed | When enabled will display "System Armed" when the panel is armed otherwise only date and time will be displayed. |
| 817 | Ext. Blk Exit | Normally the Common Area (i.e. Block 0) immediately arms when all the other blocks are armed i.e. arms simultaneously with the last block. With Ext. Blk Exit set to YES the system exit time is added to the final block's exit time giving the user more time to vacate. |
| 818 | Rearm Always | When enabled the panel will always rearm after an alarm activation when the panel is armed i.e. the sounders will re-trigger each time a new activation occurs. |
| 819 | Rearm Count | The number of times the panel will rearm if Rearm Always is not enabled. The sounders will re-trigger as many times as the rearm count is set for. |
| 81 10 | Arm Squawk | When enabled, briefly makes the internal bell squawk and flashes the strobe when the system is fully armed or set. |
| 81 11 | Infinite Exit | When enabled, overrides the Full Set Exit Time - it becomes infinite. The Exit Time only stops when an Exit Terminator zone closes. This would typically be something like a roller shutter or external push button. Arming can also be terminated with the "Final Door" option and the shunt lock zone closing. |
The Arm Squawk feature overrides the RF-Keyfob Arm Squawk setting.
82 Unset Options
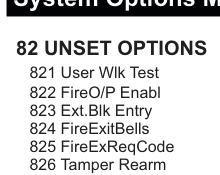
Menu tree showing 82 UNSET OPTIONS with sub-items: 821 User Wlk Test, 822 FireO/P Enabl, 823 Ext.Blk Entry, 824 FireExitBells, 825 FireExReqCode, 826 Tamper Rearm.
Used to select options for the panel when it is unset.
| # | Option | Description |
|---|---|---|
| 821 | User Wlk Test | When enabled allows the user to perform a walk test of the system using 0#3 or through the User Menu (please refer to appendix). |
| 822 | FireO/P Enabl | When programmed to NO prevents a Fire output activating when the system is unset. When armed it does allow the Fire output activate. |
| 823 | Ext.Blk Entry | Extended block entry time. When enabled this option adds the entry time of the first block to be unset to the common entry time. |
| 824 | FireExitBells | Fire exit bells. When enabled this option will activate the internal bell when a fire exit input is activated. |
| 825 | FireExReqCode | Fire exit requires code. When enabled this option will prompt the user to input their code when a fire exit input is activated. |
| 826 | Tamper Rearm | When enabled the panel will always rearm after a tamper activation. |
83 Quick Key Menu

Menu tree showing 83 QUICK KEY MENU with all quick codes: 8311 0#1 - User Log, 8312 0#3 - Walk Test, 8313 0#4 - Full Set, 8314 0#5 - Quick Arm, 8315 0#6 - Tog Chime, 8316 0#7 - Part Set A, 8317 0#8 - Part Set B, 8318 0#9 - Bell Test, 0821 01 - Sms Engs., 0822 02 - Sms Log, 0823 03 - Call PC, 0824 04 - PC Direct, 0825 05 - UserChk, 0826 06 - TmpUser, 0827 07 - HomeAlone, 0828 08 - Outputs, 0829 0*9 - SecureComm ID.
Used to select which quick codes are enabled. Each Quick Code can be individually enabled or disabled. The User can still access these functions if they have been assigned the User Menu option.
Part Set A is normally used for a Night Set and Part Set B is normally used for a Home Set.
0# Quick Codes
| # | Quick Code | Function | Description |
|---|---|---|---|
| 8311 | 0#1 - User Log | User Log | The User Log is a record of events that can be viewed by the end user. It is limited to those events that occurred since the system was last armed. |
| 8312 | 0#3 - Walk Test | Walk Test | As the end user opens a zone they will briefly hear the buzzer and interior siren, they will also see the zone description appear on the keypad display. The buzzer and internal siren will be briefly heard again as the zone is closed. |
| 8313 | 0#4 - Full Set | Full Set | The user can arm the system with an exit time. |
| 8314 | 0#5 - Quick Arm | Quick Arm | The user can arm the system with zero exit time. |
| 8315 | 0#6 - Tog Chime | Toggle Chime | The chime feature can be turned on by pressing 0#6. Pressing 0#6 again will turn off the chime feature. "Tog" is shorthand for "Toggle". |
| 8316 | 0#7 - Part Set A | Part Set A | The panel can be partially set i.e. those zones excluded from Part Set A will not activate. |
| 8317 | 0#8 - Part Set B | Part Set B | The panel can be partially set i.e. those zones excluded from Part Set B will not activate. |
| 8318 | 0#9 - Bell Test | Bell Test | The system will systematically sound the buzzer and illuminate the LEDs on the keypad, then sound the interior siren and finally prompt the user to go outside and sound the exterior siren and activate the strobe. |
0* Quick Codes
| # | Quick Code | Function | Description |
|---|---|---|---|
| 0821 | 0*1 - Sms Engs. | SMS Engineers | The last 7 non-user log events can be sent as a text message by the user to the installation engineer(s) pre-programmed phone numbers. |
| 0822 | 0*2 - Sms Log | SMS Log | The last 7 non-user log events can be sent as a text message by the user to any text enabled phone. The user will be prompted to key-in the phone number. |
| 0823 | 0*3 - Call PC | Call PC | The user can call, via the digi modem, a remote PC supporting SmartLink 7. They will be prompted to key-in the remote location's phone number. |
| 0824 | 0*4 - PC Direct | PC Direct | The user can start a SmartLink 7 session, via one of the serial ports on the panel. |
| 0825 | 0*5 - UserChk | User Check | This is used with the User Alert feature to check that a user is still on the premises. |
| 0826 | 0*6 - TmpUser | Temporary User | The user can create a temporary user code that is valid for a limited number of days. This code may be used by temporary users like tradesmen, cleaners etc. |
| 0827 | 0*7 - HomeAlone | Home Alone | This enables and disables the HomeAlone timer which is used to generate an event should a user not unset the panel within a certain time-frame. At the "Home From" time, if the panel is unset then an event will be generated indicating that the user cannot unset the panel. The event logged will indicate who did unset the panel. The "Home To" time indicates the latest time at which the user should unset the panel. If this time is reached and the required user has not unset the panel then this will be logged indicating that the user has not checked in on time. If a dialler or GSM unit is attached to the panel then the events generated can be sent as an SMS message to relevant phones. |
| 0828 | 0*8 - Outputs | Outputs | This will bring up a special user menu to operate the User Outputs directly on the system keypad i.e. without having to send commands via SMS or the HKC App. |
| 0829 | 0*9 - SecureComm ID | SecureComm ID | This will display the SecureComm installation ID and password. |
A typical set-up for a child returning from school: Home From = 16:00, Home To = 16:30 (Monday - Friday).
84 Keypad Panic Options
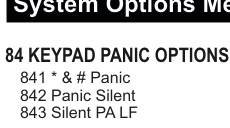
Menu tree showing 84 KEYPAD PANIC OPTIONS with sub-items: 841 * & # Panic, 842 Panic Silent, 843 Silent PA LF.
| # | Option | Description |
|---|---|---|
| 841 | * & # Panic | When enabled, activates a panic alarm when the "*" and "#" keys on the keypad are pressed simultaneously. |
| 842 | Panic Silent | When selected a panic alarm from the keypad will be silent i.e. The panic message will be sent but there will be no sirens. |
| 843 | Silent PA LF | In the event that the Panic Silent option is enabled, the Silent PA LF feature can override this and activate the sirens if a line fault has been detected. |
85 Part-Set Options
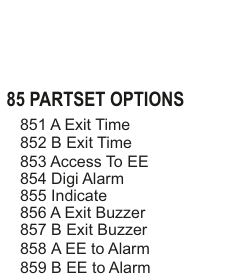
Menu tree showing 85 PARTSET OPTIONS with sub-items: 851 A Exit Time, 852 B Exit Time, 853 Access To EE, 854 Digi Alarm, 855 Indicate, 856 A Exit Buzzer, 857 B Exit Buzzer, 858 A EE to Alarm, 859 B EE to Alarm.
Used to select options for the panel when it is in part-set.
| # | Option | Description |
|---|---|---|
| 851 | A Exit Time | When enabled you will have an exit timer when setting the system into part-set A (0#7). |
| 852 | B Exit Time | When enabled you will have an exit timer when setting the system into part-set B (0#8). |
| 853 | Access To EE | When enabled this option will change Alarm zones (with the Access option enabled) to Entry/Exit zones during part-set mode. |
| 854 | Digi Alarm | When enabled, alarm events in system part-set will trigger an alarm report to the monitoring station and if it is disabled it will not. |
| 855 | Indicate | When enabled the panel's blue LED will flash to indicate that the system is in Part-set. |
| 856 | A Exit Buzzer | When enabled the panel's buzzer will activate during the part-set A exit time. When disabled the buzzer will only briefly buzz at the start of the exit time. |
| 857 | B Exit Buzzer | When enabled the panel's buzzer will activate during the part-set B exit time. When disabled the buzzer will only briefly buzz at the start of the exit time. |
| 858 | A EE to Alarm | When enabled the associated Exit/Entry zones become standard Alarm zones during the period that the system is part-set A. |
| 859 | B EE to Alarm | When enabled the associated Exit/Entry zones become standard Alarm zones during the period that the system is part-set B. |
Alarm reports will be sent to the monitoring station when the system is fully armed even if Digi Alarm is disabled.
86 Misc. Options
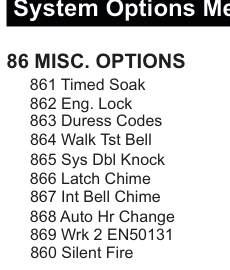
Menu tree showing 86 MISC. OPTIONS with sub-items: 861 Timed Soak, 862 Eng. Lock, 863 Duress Codes, 864 Walk Tst Bell, 865 Sys Dbl Knock, 866 Latch Chime, 867 Int Bell Chime, 868 Auto Hr Change, 869 Wrk 2 EN50131, 860 Silent Fire.
Used to select miscellaneous system options.
| # | Option | Description |
|---|---|---|
| 861 | Timed Soak | When enabled all zones and points with the Soak option enabled will remain in soak until the Soak Period (refer to Timers Menu) has expired i.e. reached 0. |
| 862 | Eng. Lock | When enabled the panel can only be returned to default settings through the Service Menu (Default Panel). Powering down the panel and pulling the factory settings link before powering up will not default the panel back to factory settings. |
| 863 | Duress Codes | When enabled valid user codes + 1 will generate a duress alarm e.g. If User 1 has code 06788 and enters code 06789 then a duress alarm will be generated i.e. a silent PA. |
| 864 | Walk Tst Bell | When enabled will sound the internal bells as well as keypad buzzers during walk test in the Service Menu. If disabled then only the Rkp buzzers will sound for activations in engineer walk test. |
| 865 | Sys Dbl Knock | When enabled any two zones with the Dbl Knock option enabled activating within the double knock reset period will generate an alarm. Note that the same zone activating twice within the double knock reset period will also generate an alarm. |
| 866 | Latch Chime | When enabled the chime mode is not cleared when the panel is armed. If disabled then the Chime mode is always turned off when the panel is armed. |
| 867 | Int Bell Chime | When enabled the internal bell will also sound in the event of a system chime i.e. a zone with chime option opening when the panel is unset. |
| 868 | Auto Hr Change | When enabled the time in the panel will advance by 1 hour for Summertime and go back by one hour for Wintertime. |
| 869 | Wrk 2 EN50131 | When enabled, the system will invoke EN50131 features that are not normally programmable e.g. entering the engineer code with user code authorisation. |
| 860 | Silent Fire | When enabled the internal and external bells do not activate. However, a fire message is still displayed on the keypad and a message sent to the monitoring station. |
87 Audio Options
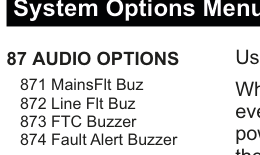
Menu tree showing 87 AUDIO OPTIONS with sub-items: 871 MainsFlt Buz, 872 Line Flt Buz, 873 FTC Buzzer, 874 Fault Alert Buzzer.
Used to select buzzer options for panel events.
| # | Option | Description |
|---|---|---|
| 871 | MainsFlt Buz | When enabled the Rkp buzzers will sound every 4 seconds (in addition to a visual indication) during a power cut and if the panel is unset. If this option is disabled then there will only be a visual indication. |
| 872 | Line Flt Buz | When enabled the Rkp buzzers will sound once every 4 seconds indicating a line fault condition similar to the Mains Flt Buz option. |
| 873 | FTC Buzzer | When enabled the Rkp buzzers will sound every 4 seconds (and have a visual indication) in the event of the dialler failing to communicate after 3 attempts. |
| 874 | Fault Alert Buzzer | With the restricted indication option selected, you may not want to depend on just the LEDs to inform the end user of faults. In this case set Fault Alert Buzzer to YES for an additional audible alert. |
"FTC" is shorthand for Failed to Communicate.
88 Edit Misc. Text
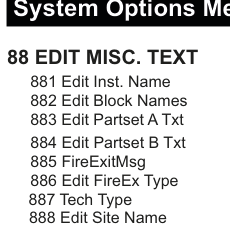
Menu tree showing 88 EDIT MISC. TEXT with sub-items: 881 Edit Inst. Name, 882 Edit Block Names, 883 Edit Partset A Txt, 884 Edit Partset B Txt, 885 FireExitMsg, 886 Edit FireEx Type, 887 Tech Type, 888 Edit Site Name.
Used to edit miscellaneous text descriptions.
| # | Option | Description |
|---|---|---|
| 881 | Edit Inst. Name | Used to edit installer's name. The installer's name is displayed when the panel is unset along with any other status messages; not allowed in EN mode. |
| 882 | Edit Block Names | Used to program a more meaningful descriptions for the blocks. |
| 883 | Edit Partset A Txt | Used to edit text that will be displayed when panel is in part set (or partguard) A. Also displayed in the log. |
| 884 | Edit Partset B Txt | Used to edit text that will be displayed when panel is in part set (or partguard) B. Also displayed in the log. |
| 885 | FireExitMsg | Used to change the message that is displayed when a fire exit is open (normally "FIRE EXIT OPEN" is displayed). |
| 886 | Edit FireEx Type | Used to change what is displayed in the log when a Fire Exit is activated (normally "FireEx" is displayed). |
| 887 | Tech Type | Used to change what is displayed in the log when a Technical Zone is activated (normally "Tech" is displayed). |
| 888 | Edit Site Name | Used to edit the installation's identification or address. This name appears at the top of a reports printed via the serial printer port. Also used with SmartLink7 up/download application. |
The site name for SMS texting is done elsewhere i.e. in the SMS Menu.
89 Garda Policy / BS8243 Options
The menu structure for section 89 differs between Ireland and the UK.
Ireland: 89 Garda Policy Options
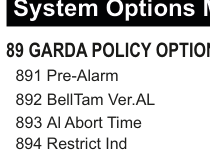
Menu tree showing 89 GARDA POLICY OPTIONS with sub-items: 891 Pre-Alarm, 892 BellTam Ver.AL, 893 Al Abort Time, 894 Restrict Ind.
| # | Option | Description |
|---|---|---|
| 891 | Pre-Alarm | Any subsequent alarm activation, after a pre-alarm, generates a full alarm condition. In other words, the initial alarm is "verified" by the secondary alarm. Selecting Pre-Alarm enables this feature. In the SIA protocol the initial alarm is reported as a BA (Burglary Alarm) and the verified alarm as a BV (Burglary Verified). |
| 892 | BellTam Ver.AL | If Bell Tamper -> Verified Alarm is enabled then a bell tamper generates a full, verified alarm when the system is armed. |
| 893 | Al Abort Time | In minutes, is the time allowed for a subsequent alarm event to be flagged as a confirmed alarm. For instance, if a second alarm event falls within the time it is a "confirmed" alarm. If it falls outside the time it will be treated as a new pre-alarm event. |
| 894 | Restrict Ind | If Restricted Indication is set to YES, system faults (e.g. panel battery fault, fuse fault etc.), are latched. Faults are only displayed on the keypad when a User Code is keyed-in; so mainly during the setting/unsetting sequence. Also, system faults will have no audible warning. |
In Contact ID, BA = 130 and BV = 139.
Note 1: Section 8.5.2 of EN 50131-1 was amended so that the fault & alarm indications (including Mains faults) are restricted to people who key-in their User Code. Casual observers may only be permitted to see a non-specific "Alert" indication. Setting Restricted Indication to NO allows the fault & alarm indications to be seen by everyone whether a User Code is keyed-in or not.
Note 2: The Red & Yellow LEDs flash simultaneously as an Alert Indication.
UK: 89 BS8243 Options
Menu tree showing 89 BS8243 OPTIONS with sub-items: 891 Police Options, 892 Technistore Options.
There is a different menu structure in the UK. The BS8243 Options menu has two sub-menus: Police Options and Technistore Options.
891 Police Options
There are 9 sections in the Police Options menu.
| # | Option | Description |
|---|---|---|
| 1 | Alarm Conf | Shorthand for confirmed alarm. When set to YES means that the system needs to send two or more alarm activations in order to get a police response i.e. a pre-alarm and a confirmed alarm. |
| 2 | AL Conf Time | Shorthand for alarm confirm time. Used as a window to handle pre-alarms and confirmed alarms. Set to 30 minutes by default. |
| 3 | Auto Inhibit | When set to YES, the system will automatically inhibit the pre-alarm or pre-panic alarm zone should it still activate at the end of its confirm time. It will be reinstated the next time the system is armed. |
| 4 | Panic Conf | Shorthand for confirmed panic alarm. When set to YES means that the system needs to send two or more panic alarm activations in order to get a police response i.e. a pre-panic alarm and a confirmed panic alarm. |
| 5 | PA Conf Time | Used as a window to handle pre-panic alarms and confirmed panic alarms. Set to 8 hours by default. |
| 6 | Prox Entry | When set to YES, the system must be disarmed using a proximity tag. When set to NO, the user can use their user code instead. |
| 7 | Access / BV | By default set to NO. This means that zones assigned with the Access attribute will never flag a confirmed alarm (a BV in the SIA protocol) to the monitoring station when activated. |
| 8 | Engineer Reset | When set to YES means that an engineer must visit and key-in their code after a confirmed alarm or panic alarm activation otherwise the end user cannot arm their system. As an alternative to this method you can use the Technistore option. |
| 9 | Restrict Ind | If Restricted Indication is set to YES, system faults (e.g. panel battery fault, fuse fault etc.), are latched. Faults are only displayed on the keypad when a User Code is keyed-in; so mainly during the setting/unsetting sequence. Also, system faults will have no audible warning. |
AL Conf Time conditions:
- Two separate detectors activating within the confirmed alarm time window will generate a confirmed alarm.
- If the second detector activates after confirmation timer has expired, pre-alarm output re-triggers but no confirmed alarm is generated.
PA Conf Time conditions:
- Two separate panic activations activating within the PA Conf Time window will generate a confirmed panic alarm.
- If the second detector activates after confirmation timer has expired, pre-alarm output re-triggers but no confirmed alarm is generated.
Zones with Access / BV set to NO can still flag unconfirmed or pre-alarms to the monitoring station.
Note 1: Section 8.5.2 of EN 50131-1 was amended so that the fault & alarm indications (including Mains faults) are restricted to people who key-in their User Code. Casual observers may only be permitted to see a non-specific "Alert" indication. Setting Restricted Indication to NO allows the fault & alarm indications to be seen by everyone whether a User Code is keyed-in or not.
Note 2: The Red & Yellow LEDs flash simultaneously as an Alert Indication.
892 Technistore Options
There are 2 sections in the Technistore Options menu.
| # | Option | Description |
|---|---|---|
| 1 | Technistore | When Enabled (i.e. set to YES) the system generates a random "quote code" in the event of an engineer reset condition. The keypad displays "Call Alarm Centre" and indicates the quote code. The user then contacts the central station and tells them this code. In turn the central station gives the user a reset code which is then used to perform the engineer reset. By default this feature is not enabled. |
| 2 | Code Version | This needs to be setup during installation. Please contact your monitoring station for details. |