Appendix B - IP Monitoring / SecureComm Portal
HKC now offers a link to your ARC via our SecureComm service. To avail of it, please go to securecomm.hkc.ie portal to set up the billing arrangements. Go to your browser and type securecomm.hkc.ie into the address bar as illustrated.
Browser address bar showing the URL "securecomm.hkc.ie" typed into the address field of a new browser tab.

Once you enter the portal, follow the prompts.
You'll need to have the client's BIC and IBAN numbers to hand. However, if your client only knows their old sort code & account No. then they can convert at: https://ipsosepaservice.sentenial.com/ipso/oneShotIRL
After you have selected your country, you will be asked to choose between Branded and Not Branded.
Radio button selection showing two options: "Branded" (selected) and "Not Branded", with Back and Next navigation buttons below.

Select Branded and click NEXT. Then login using your SmartLink700 login details:
Login form titled "Please provide your Smartlink 700 login details" with fields for Login (showing "aaa@aaa.com") and Password (showing masked dots), with Back and Next navigation buttons below.

Please read the terms and conditions. If they are satisfactory then tick the box and click NEXT. You will then be prompted to select a service.
-
SecureComm
- Requires GSM-SC, GSM-SW-SC, WiFi or Ethernet module fitted
- App control + notifications
- SMS control + notifications
- Monitoring of connectivity
-
SecureText (Landline text)
- Requires a landline with caller id enabled
- SMS notifications
Service selection screen showing two radio button options: "SecureComm" (selected) with its feature bullet points, and "SecureText (Landline text)" with its feature bullet points, along with Back and Next navigation buttons.
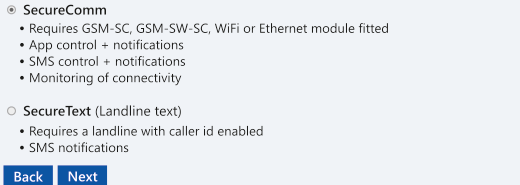
Select SecureComm and click NEXT. Then select the type of installation you want i.e. Residential or Commercial and click NEXT. You will then be prompted to choose between:
-
Standard
- App control + notifications
- SMS control + notifications
- Smartlink Upload/Download
- Monitoring of connectivity
-
IP Monitoring
- IP Signalling to central station
- (Requires separate contract with central station)
-
Standard with IP Monitoring
- Both of above options
Monitoring service level selection showing three radio button options: "Standard" with its features listed, "IP Monitoring" with its features listed, and "Standard with IP Monitoring" (selected) described as both of the above options.
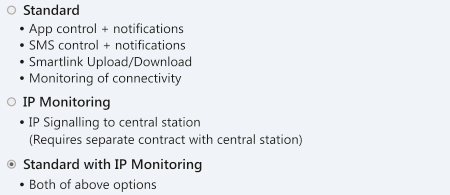
In this example we have gone with the standard SecureComm service plus IP reporting.
There are two ways of paying for the service, either by the end user or by the installation company. In this example we are going with Customer direct and then click NEXT.
Billing selection screen titled "Select who will be billed for this installation" with two radio button options: "Installer account" and "Customer direct" (selected), with Back and Next navigation buttons.

You will be then offered different SecureComm service levels. Pick one and click NEXT.
Then you will be offered a list of Monitoring Stations (ARCs). Again, pick one and click NEXT.
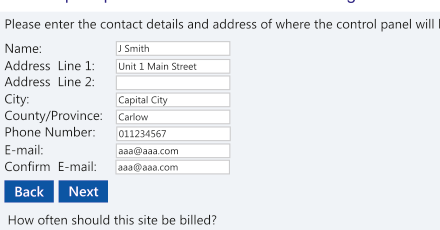
Finally, you will be then offered different Monitoring service levels. Pick one and click NEXT. You will then be prompted for the installation and billing details.
Installation details form titled "Please enter the contact details and address of where the control panel will be installed" with fields for Name (J Smith), Address Line 1 (Unit 1 Main Street), Address Line 2, City (Capital City), County/Province (Carlow), Phone Number (011234567), E-mail (aaa@aaa.com), and Confirm E-mail (aaa@aaa.com), with Back and Next navigation buttons.
Billing frequency selection screen titled "How often should this site be billed?" with three radio button options: "Every month" with monthly Direct Debit, "Twice a year" with biannual Direct Debit, and "Once a year" (selected) with annual Direct Debit. Includes a PO Ref (optional) field and Back and Next navigation buttons.
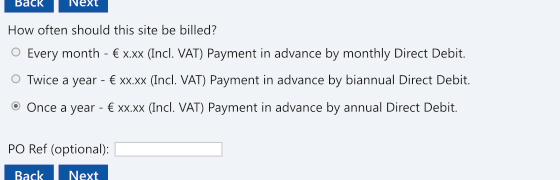
How often should this site be billed?
- Every month - € x.xx (Incl. VAT) Payment in advance by monthly Direct Debit.
- Twice a year - € xx.xx (Incl. VAT) Payment in advance by biannual Direct Debit.
- Once a year - € xx.xx (Incl. VAT) Payment in advance by annual Direct Debit.
PO Ref (optional):
If the billing details are the same as the installation detail, tick this box: Use Site Installation details
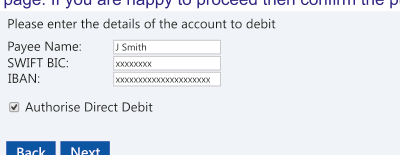
When you fill in the BIC and IBAN details and click NEXT you'll be shown the all the details on one page. If you are happy to proceed then confirm the purchase and click NEXT again.
Account debit details form titled "Please enter the details of the account to debit" with fields for Payee Name (J Smith), SWIFT BIC (xxxxxxxx), and IBAN (xxxxxxxxxxxxxxxxxxxxxx), with an "Authorise Direct Debit" checkbox ticked, and Back and Next navigation buttons.
Account setup is now completed. You will be given an Installation ID number. You can now go ahead and activate the installation, this is done through the SecureComm menu on the control panel.
Please take note of the installation ID, this is required to activate the site and will be required by support if any issues arise.